- Published on
Jupyter Notebook 10分チュートリアル
- Authors

- Name
- Shou Arisaka / 有坂翔
プログラミング学習やチュートリアルの作成、ノートテイキングなどに重要な役割を果たす、インタラクティブなウェブベースのプログラム実行環境、Jupyter Notebookについて紹介します。
「Jupyter Notebook」はブラウザから編集・閲覧できるノートテイキングツール。PythonやBash、その他複数の言語の実行結果をノートとして表示したり、PythonのグラフやLatexなどもレンダリングできる。要はMarkdownもLatexもプログラミング言語もまとめて使用できるEvernote的なもの。 また、ウィジェットと呼ばれる機能を使うことでユーザーからのインプットに答えるインタラクティブなこともできるなど機能は様々。
公式チュートリアルガイド: Jupyter Notebook Tutorial: Definitive Guide (article) - DataCamp
Githubリポジトリ: Topic: jupyter-notebook
Jupyter Notebookのインストールと起動
python3 -m pip install --upgrade pip
python3 -m pip install jupyter

jupyter notebook
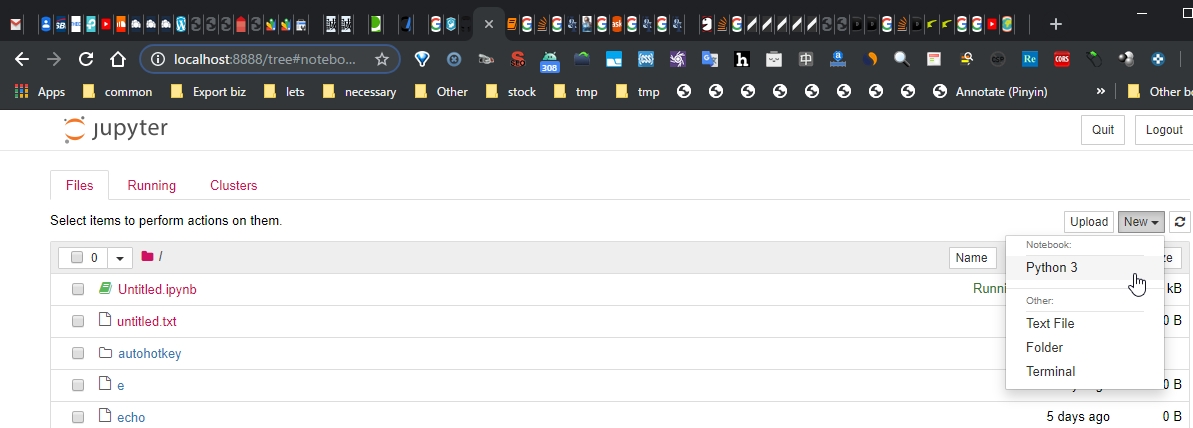
トークン付きのURLをブラウザで開いたら、NewボタンよりPython3を選択して新規のノートを作成する。
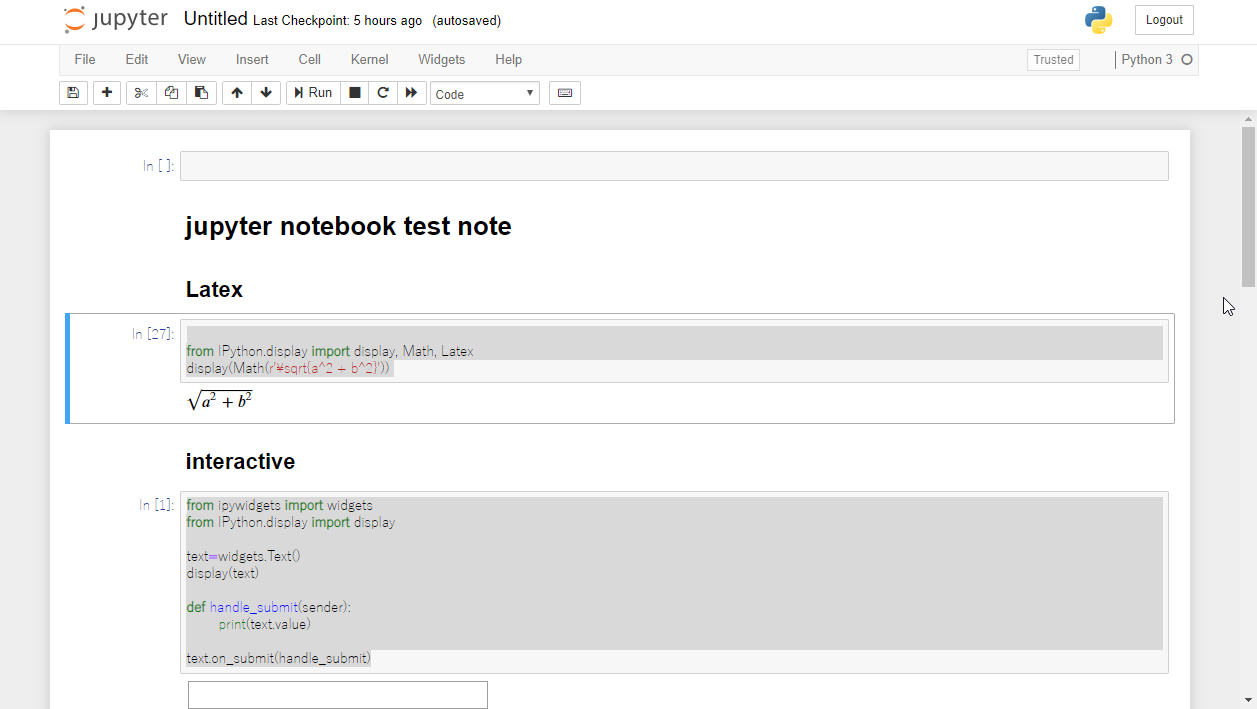
Pythonを実行

from IPython.display import display, Math, Latex
display(Math(r'\sqrt{a^2 + b^2}'))
Markdownを書く
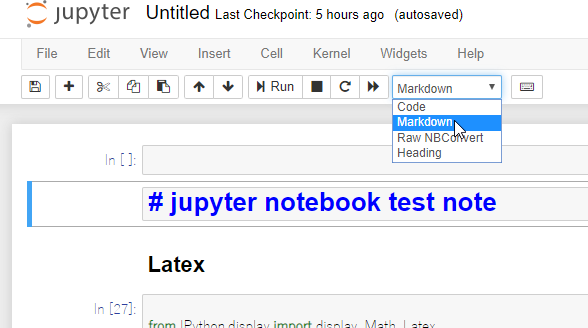
Markdownを書きたい場合は画面上部バーのセレクトボックスからMarkdownを選択。
Bashとかを実行
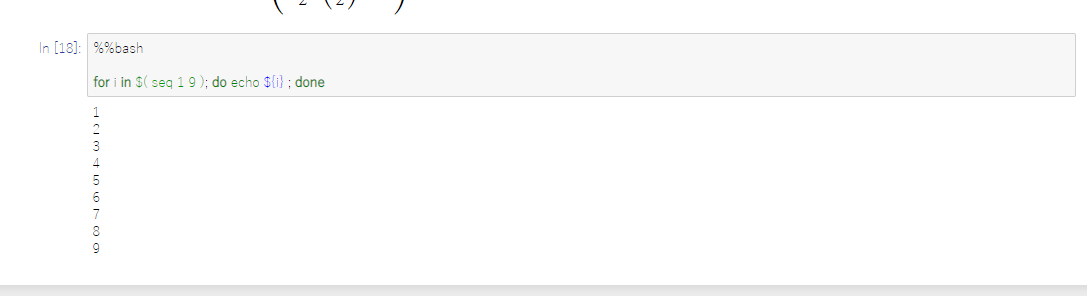
%%bash

for i in $( seq 1 9 ); do echo ${i} ; done
latexは以下。
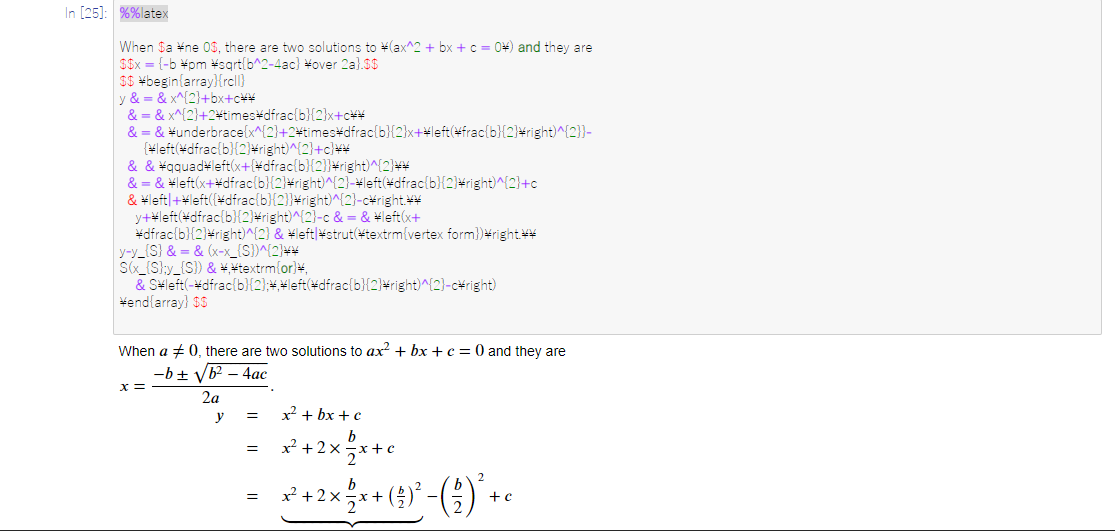
%%latex
インタラクティブインプットボックスの実装
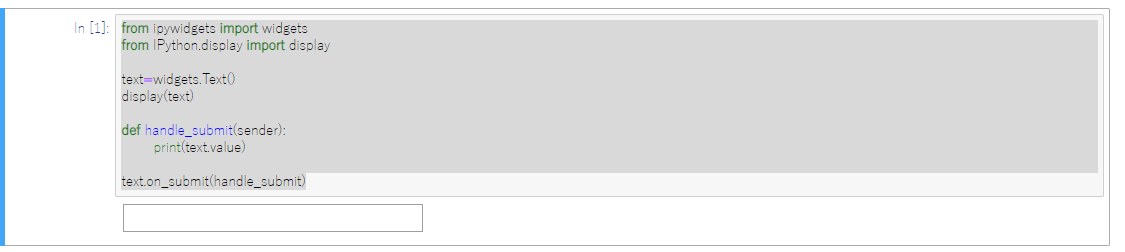
from ipywidgets import widgets
from IPython.display import display

text=widgets.Text()
display(text)

def handle_submit(sender):
        print(text.value)

text.on_submit(handle_submit)
エクスポートして共有する
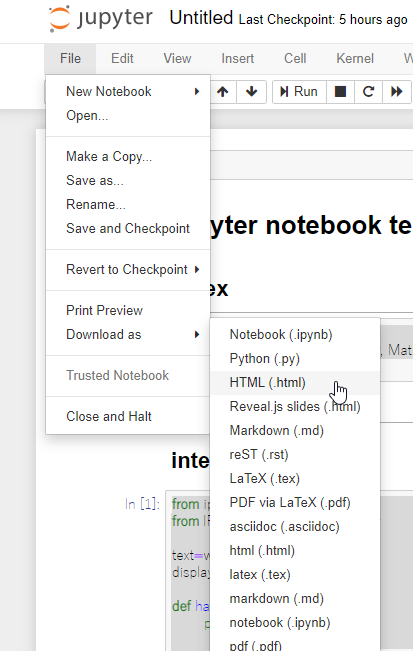
作ったノートはHTMLやIpynb形式でエクスポートできる。HTML形式など静的なタイプへエクスポートするとインタラクティブなインプットボックスなどは使えなくなる。ipynb形式はJupyter Notebookを表す拡張子なのでこれでエクスポートしてGithubなりでシェアするなりするとインタラクティブを残したままシェアできるらしい。